Quote for Today

Home

Showing posts with label spellbinders. Show all posts

2013-04-05

Now We are One

Posted by Unknown 1 comments
Evan is 1 today!
Craftywhippet and I had such fun thinking about our Grandsons' birthday cards. She came up with the idea that we could make a giant A4 stepper card (but twice the normal A5 size) and fill it with photos from the past year, with a larger photo from as near a year old as possible in the centre.
Large Stepper
I love working with photos, and resized them onto holographic card to fit the steps and rise up behind each other, managing to squeeze on 21 photos altogether. Tatty Teddy hearts paper on the A5 section, and Spellbinders Romantic Rectangles die to shape the larger photo, surrounded by name and age banners designed with MS Publisher, and finished with a glittery1and star.
To scale on trimmer
Evan's Auntie Debbie has been busy making Noah's Ark clay animals for on top of his birthday cake. Aren't they great? Her friend Victoria made the Rainbow cake.
Debbie got carried away introducing animals to their spouses
Off now to celebrate with his new Little Tikes Jubilee car... 
Evan in Jubilee Little Tikes

2013-03-21

Tatty Teddy Easter

Posted by Unknown 0 comments
We got on with our filming yesterday, having prepared all week with waterfall, stepper cards, and digital cards from Spring Chic CD-rom. Now to film the introduction and ending...
Guess what? I forgot to check the battery for the remote control! However, that only required one of us to get off our seat and manually start/stop the video camera. Giggling together as usual, afterwards my brain suddenly kicked into gear and remembered I had a spare battery, where? In the camera case, of course. So we just filmed a little extra bit for the end of the video. We hope you enjoy Tatty Teddy Easter and look forward to your comments. What will we film next?

Here are some of the cards we made:
Tatty Teddy Easter sample card for Hospice
Tatty Teddy Easter card packs for assembling at Hospice
Tatty Teddy Baby Dedication card
Tatty Teddy Easter Waterfall cards
Tatty Teddy Spring Chic Digital cards
Tatty Teddy Easter mini Gatefold card
Tatty Teddy Engagement card
Tatty Teddy Ruby 40th Anniversary Stepper card
Tatty Teddy Birthday card for a crafter

2013-03-18

Going with the Flow

Posted by Unknown 0 comments
Hi,
We are finally getting organised and back into crafting demos and blog posts plus a quick tip on YouTube for removing dies from card. There may be other tips that we can add as we go along as I am always eager to find an "easier way", especially regarding measuring!
In the very near future we plan to have some cards on display giving different ideas and we will talk through how they were made. The theme is Tatty Teddy. Alice and I have both been busy with ideas so that we can have different cards to show you plus quick and easy for new crafters. 

2013-03-15

Packaging Tatty Teddy

Posted by Unknown 0 comments
When we got products like our Tatty Teddy card kits, I used the packaging pictures for other cards by running them through the Big Shot or Cuttlebug with the likes of a Spellbinders die circle, oval, square or rectangle, depending on the shape. To release the die easily you can use greaseproof paper between the die and the card. But Ruth has another little Tip which you can see on our one minute video on YouTube.
Tatty Teddy With Love A5 Decoupage Card Kit
Tatty Teddy packaging shapes

2012-10-29

Christmas Begins

Posted by Unknown 4 comments
I know some of you have been making Christmas cards all year, but the craft group has only started. We used square cards covered with a square of Designer paper, then a Spellbinder square with an image from Lili of the Valley on top, ribbon along the base and a simple card was made!

Actually it took us an hour to get started, because we were poring over purchases from the Craft Fair that some of the group had bought.

Next day the rest of us went, with instructions to purchase missed items. Ruth and I were equipped with wheeled trolleys. But guess what I forgot to take? - My camera. I took exactly one photo on my mobile (cell phone) because it slipped my memory!

We got new plates for our Big Shots, Spellbinders dies, card, Inkylicious and Chloe rubber stamps, Splodge mats, Tatty Teddy and LOTV toppers, Bazoo papers, a large bauble punch, jewellery cords and magnetic clasps and bling to name a few.
Alice's Loot
I weakened and got another bag like my main craft bag, only it holds A4 items, though unfortunately no lid against the rain.
Alice's Bag and more Loot
Ruth's Loot
Ruth, too, weakened and bought a new wheeled trolley at a bargain price, which opens out and has velcro-attached containers. You can never have too many storage items!
Ruth's Bag opened and more Loot
Ruth's Wheeled Tote

2012-10-23

Back again!

Posted by Unknown 1 comments
We had another ink dusting evening at our craft group. Ruth had previously shown us how to make little ink-dusted pictures on Spellbinders shapes so I thought 'Christmas'! and devised Romantic Rectangle shapes with ink dusting right across both pieces and the card to give a one piece pinky-toned night sky. Sheena Douglass Christmas tree stamp fitted one shape and Inkylicious Night Before Christmas on the other. Both were glitter-stickled and lo! one card completed.
Twas the Night Before Christmas...
Some of my recent cards:
To mark my Son's 1st Father's Day
My Son and Daughter-in-law's 3rd Anniversary

My Special Daughter-in-law's Birthday
Ruby Wedding

Next up is Hobbycrafts and Crafts for Christmas at the SECC down by the Clyde! This weekend! We're off, and hope our energy holds out...

2012-06-12

3 Die-Cutting Machines

Posted by Unknown 3 comments

Ooh, it's here! It was delivered today - how fast was that from Card Craft UK
Now to check where not to cut! - and get my tree die back from Jane to try.

2012-06-09

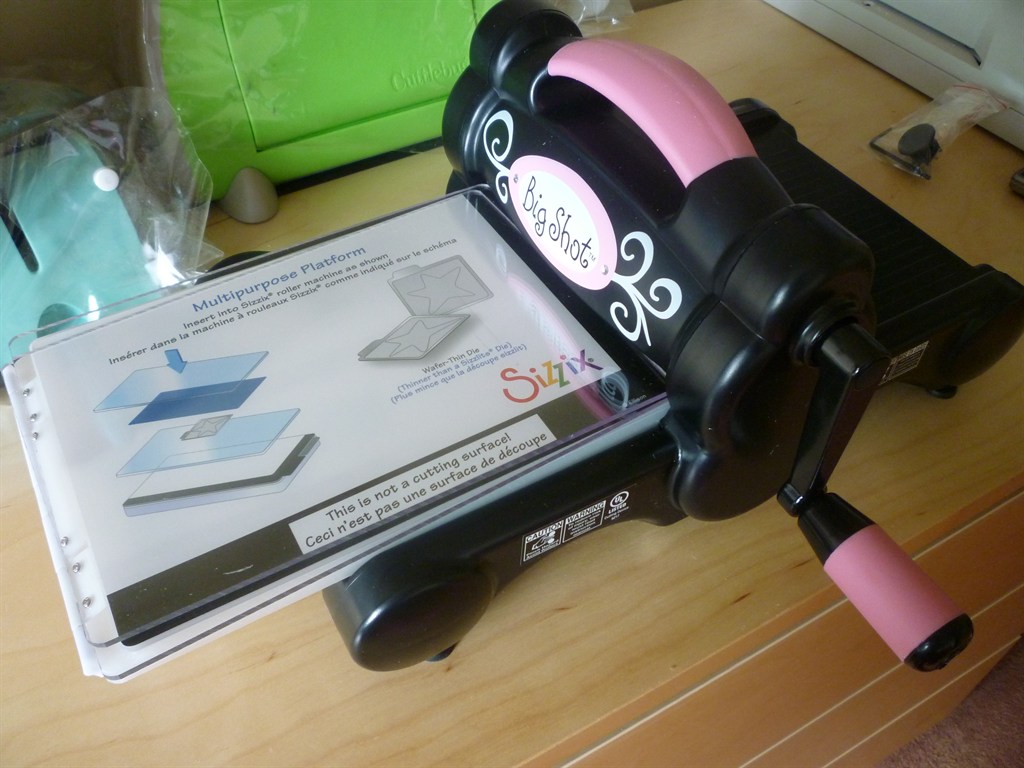
Big Shot

Posted by Unknown 3 comments
As you know, the tree die was left to Jane's tender ministrations.
She emailed me and said,
Alice. Your tree die cut like a dream on the big shot.
I used one shim about 200grm and ran it through twice, turning the die on the 2nd run through. Then tried the die again just putting it through the machine once with the shim and it cut out no problem. Just needed a wee bit more wiggling to get the bits out.
I just might be investing in this die now.
So guess what? Yup, I've ordered a Big Shot machine, because I would like to buy more of these lovely Memory Box dies.

2012-06-08

Getting Shirty at the Craft Group

Posted by Unknown 2 comments
I have had had more help from Dave of Memory Box and he sent this useful link to his video.  This gave me more ideas about how to get the tree to cut out all over, not just in the centre, by using a metal plate - but this didn't work either.

Adding the centre patch just took away the pressure from the outer leaves, so that's been removed. At the craft group Jane tried it on Ann's Cuttlebug with no success.  She's taken the die home to try in the Big Shot. So... back to the craft night. I had bought a set of three rubber stamps for male cards. Ann suggested I size down this shirt and tie to fit the 2" square punch used for the Waterfall card and do it for my project.  I sized and centred it in MS Publisher and printed out lots of little squares for the girls.
These were coloured with alcohol pens and distress-inked at the edges, then attached to the mechanism. A background was made by using a Versamark ink pad then chalking over that, or brushing with mica powders, or heat embossing.
I coloured four more shirts for future use but the finished product of my sample is blue of course!
Dave's video:

2012-06-07

Cutting Edge Comments

Posted by Unknown 1 comments
Well, thank you Annie, MaryNSC, Rita, Little-ladys Crafts, Debbie for all your commenting suggestions in response to my request for help with using Memory Box dies.

I also received a reply from the manufacturer.

Hi Alice – I do have a little trick with this die that you might try. The center of the tree is pretty detailed, so it sometimes needs a spot shim, depending on how tight your machine is. Rather than using an entire piece of paper to shim, add several layers of tape (masking tape, scotch tape, etc.) to the back of the die, right in the middle. This will increase the pressure in just the right spot, allowing the middle to cut out better. You can leave the tape on the back of the die for future use.
Does this help?
let me know!
dave
Memory Box, Inc.

I have tried all these suggestions, rejigged my sandwich according to the googled video and still have not got the leaves cut out, though the tree is improved.

Now what?

2012-06-06

A cut above the rest?

Posted by Unknown 5 comments
My die-cutting machine is a first generation Spellbinders Wizard, which works better now that I have the new plates. I later bought a first generation Cuttlebug because it is so simple for the embossing folders.

I have a fair collection of Spellbinder, Sizzix, X-Cut and Go Kreate dies too
At the last Craft Fair I bought a Memory Box die of a lovely tree, but, oh dear, I am having little success with it despite using thinner and ever thinner card with shims and hurting my wrist into the bargain!
I store my stencils and some dies in this A6 photo album
The Craft Group has been set a Challenge to make a tone-on-tone card, using only one colour throughout. I have used the tree and the frame dies in various tones of green, so we will see it how it eventually turns out.
The previous Challenge was to make a digital-program-only card, and you saw the stepper card I made on a previous post.  I have added more ruby tweaks to transform it into an anniversary card for hubby.


Craft & Chat Copyright © 2006 Designed by Ipietoon Blogger Template Copyright © 2009 Sponsored by Online Shop Vector by Artshare